Saturday 27 July 2013

Blowing in the wind

Ground reference manoeuvres

We've just returned, hot and sweaty, from lesson nine of ninety-four. Things are starting to fall into place and while my flight was very far from perfect, I didn't make any big errors today and held my altitude a lot better. Normally I throw in a few clangers, such as talking on the wrong frequency which is very confusing for the recipient or having a blank brain moment half way through a checklist or even forgetting to level off at the top of a climb.

Today's lesson was an interesting one. Called 'ground reference manoeuvres,' it is a requirement of the American authorities and not something that I recognise from UK training.

It sounds simple — just fly a series of basic manoeuvres; turns around a point, tracking around a square and S-turns across a line. The challenge is to fly them accurately with reference to ground features. This brings two difficulties.

Firstly, the exercise is flown fairly low so our ham-fisted wandering around the sky, almost unnoticeable at height, suddenly becomes very obvious. The second is the biggie — understanding the wind. The wind complicates flying enormously and can take quite a while to get your head around.

Unlike a car, an aeroplane has no attachment to the ground and doesn't give a hoot about where it is or what is underneath it. It flies relative to the surrounding air only. Invariably the air is moving; in other words there is a wind blowing.

Normally, you think of the wind as blowing against you; you can feel its force pushing you around. But that's a a ground-based way of looking at things. An aeroplane does not feel the wind, is simply moves with it just as a balloon or a cloud does. From a few seconds after take off until touch down, the wind (if constant) has absolutely no effect on the way the aeroplane flies.

If you didn't look down at the ground you would never know the wind was there. Even the instruments are of limited help. The compass will tell you which way you are pointing, but is not the way you are going, not if there is any wind. Similarly, the air speed indicator tells you how fast you are flying through the air, but your speed over the ground might be quite different.

Top: what happens if you ignore the wind (bad)
Bottom: getting the right correction angle (good)
So — say you wanted to fly directly east to a friend's airstrip, but the wind is coming from the north (your left). If you ignore it and just point the plane east you are going to end up way to the south (your right) of where you wanted to go, because during this time you and all the air around you has drifted south.

The answer is to point the aeroplane slightly into the wind, so the nose is a little to the left of where you actually want to go. The aeroplane will appear to people on the ground to be skidding sideways, but this is an illusion; it is flying straight through the air, but the air itself is moving.

Get this 'wind correction angle' just right, and your slow progress to the left will exactly cancel the right drift from the wind and you get to your buddy's airstrip by the most direct route. The correction angle depends on the wind speed, air speed and the track on the ground you want to fly. Not easy to do in your head — for longer trips pilots will calculate it in advance using a 'navigation computer', which sounds posh but is actually is a couple of bits of plastic nailed together in the middle. I won't bore you by explaining how it works; here is a guide.

Wind affects speed as well as direction; if the wind is behind you rather than from the side, your ground speed will be faster than your airspeed, and visa versa.

How wind can ruin a good turn (FAA Flying Handbook)
Wind also affects turns. We try to turn in neat, accurate circles. This isn't too hard to do through the air, but the wind messes things up when you want to describe a circles on the ground, you end up flying a sort of squashed spiral pattern.

To counteract this, when turning into wind we must use less bank for a more gradual turn because our ground speed is low, and steep bank when flying downwind to compensate for the high ground speed.

I hope you can see there is more to flying around a square field than first meets the eye! So how did it go? Judge for yourself.

We arrive at the top left of the picture, and I first attempt a one-mile circle around the spot marked in blue. Then I attempt to fly twice around the set of fields marked in blue again keeping one mile away. Finally I am trying to fly S-turns over the road in the middle, aiming to cross it at 90 degrees each time.


I have jury-rigged an old phone as a GPS logger and it does jitter around a bit, I wasn't wobbling around quite that badly as the image suggests, but I concede there is room for improvement! I should point out the wind was very light making the exercise much easier that it should have been.

After landing, we had a chuckle when ground control told an Airbus A320 to hold and wait for us, rather than the other way around. I was a little worried we would get sucked into the engines as we trundled past the monster in our little spam can.

Next week we are starting some basic instrument work — how to fly a plane without looking out of the window! I suspect the poor old brain is going to be hurting again.

Some pretty pictures especially for fellow cloud spotters


Intense downburst from a towering cu-nim (in English; a rain cloud)

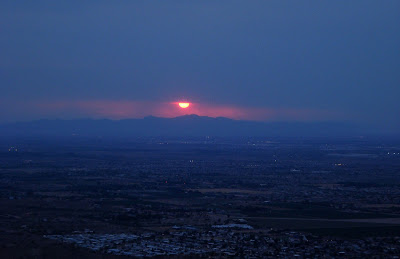
Arizona can be relied on for dramatic sunsets

A rainbow over the Rainbow Valley practice area

And just to prove I'm not making all this up!


Saturday 13 July 2013

'About to write blog' checklist complete

At long last, our flight training has begun. It's been a slow start, with instructors still busy with students nearing the end of their training but we've all been up at least once and lessons should fall into a regular rhythm next week.

One of the school's Piper Warrior aircraft on final approach to Mobile,
a runway in our Rainbow Valley practice area
(middle of nowhere) built by Lufthansa for training.
For me, the flying here could not be much more different from my previous experience. We are operating from a long concrete runway under air traffic control in a very busy area, which is a big contrast to the rural grass airfields of East Anglia. The aircraft handle in more or less the same way as others I have flown of course, but have far more instruments and equipment on a huge panel, and a comparatively poor view outside.

But the biggest difference is the deliberate, standardised procedural approach to flying. In gliding, you learn a set of skills but must constantly use your judgement to decide your next move. There is no fixed plan, instead you adapt to the situation, making the best of the sky around you.

The panel and controls in a PA28 (Photo Martin Hodgson)
Here — and in the passenger jets we will eventually fly — every phase of the flight is carefully planned and flown according to a standard procedure with an associated checklist. Many of these have to be memorised, which is a daunting task at first. It's one thing to master them on the ground, but when you are flying a plane, trying to follow a fixed route and listening and talking on the radio you tend to find they drop right out of your head. Silly acronyms certainly help (A-Bump-Firms and Meat-log are two of mine) but it's very easy to forget what each letter is supposed to stand for when you are a little busy.

To illustrate this idea (and not, I hope, to bore you silly) a typical one-hour lesson with an instructor might go something like this:

Two hours before take-off:
  • Meet up with flying buddy, in uniform with all the required kit packed.
  • Check with dispatch which aircraft has been assigned, review the technical log, then go out to the aircraft detailed set of checks on it (The 'A' checklist). 
  • Assuming no faults are found, return to the student crew room to plan the flight. 
  • Get the current and forecast weather for the route and any weather warnings. These are in an archaic and highly cryptic format that only pilots can understand.
  • Read all the special notices and restrictions (called "NOTAMS" or "Notices to Airmen").
  • Complete mass and balance calculations to check that the plane will not be overloaded or out of balance at any point during the flight. 
  • Complete a risk assessment.
  • For cross country flights, prepare a flight log with all the waypoints, times, speeds etc. Mark up the map with all this information. File a flight plan with air traffic control.
Half an hour before take off: 
  • Meet up with the instructor, brief the contents of the lesson and the departure and arrival procedure in use. Review all the paperwork prepared above.
  • Book out and walk out the the aircraft. Do the pre-start checklist, followed by the start checklist and the after-start checklist.
  • Contact dispatch to 'block out' and taxi onto the apron, while doing the taxi checklist from memory.
  • Complete the power checklist, followed by the lengthy before take off checklist.
  • Call ground control and get clearance to taxi to the runway holding point.
  • Call the control tower and get clearance to take off.
  • While lining up on the runway, complete the cleared onto runway check list from memory.
Take off!
  • While not strictly a checklist, there are various checks to be done during the ground run.
  • Between taking off and 200' you can concentrate solely on the flying!
  • At 200', complete the after take off check list.
  • During the climb, regularly check the engine instruments and weave from side to side, as you can't see over the nose.
  • Complete the top of climb checklist, and made a radio call when entering the practice area.
The actual lesson
  • The content of the lesson is defined in the school syllabus, and designed to start from the very beginning regardless of previous experience. Not that I mind this in the least, as you can see there is plenty to learn and practice even if in the early lessons the exercises are straight forward. Around 30 minutes are available for the actual exercises.
  • At regular points during the lesson, carry out the routine cruise checklist and make position calls on the radio
Going home
  • When it's time to head back, listen for the weather conditions at the airport (the "ATIS") and give a descent briefing.
  • Complete the descent checklist from memory, interrupting if needed to call the control tower and to announce your departure from the practice area.
  • Complete the initial approach checklist from memory once near the landing circuit.
  • Complete the landing checklist (memory again), also radioing your position and getting a landing clearance.
  • For the final part of the circuit, approach and landing, you are allowed to concentrate on the flying more or less uninterrupted.
  • At 300 foot, you must decide if you are 'stable' — on the right line, with the right speed and height, set up for landing and with acceptable visibility and wind speed/direction. If not... you must go around and try again.
  • When safely down and clear of the runway, stop and do the after landing checklist.
  • Radio ground control for taxi clearance and return to the parking area.
  • Complete the closing down checklist.
  • Call dispatch to let them know you are back.
  • Chain down the aircraft and install the sunshades.
  • Leg it to the nearest air-conditioned building.
At any point between start-up and shutdown, the instructor can and will throw in emergency drills. Here you must perform the correct emergency checklist from memory. There are seven of them.

And finally...
  • The instructor will de-brief the lesson, and make suggestions on what you could have done better (i.e. not fluffing the checklists). 
  • They will file a report on the lesson and enter the times in to the database, check and sign your logbook, and set you any homework. 
  • Oh, and if you filed a flight plan you'd better remember to close it or search and rescue will be out looking for you — and that can get very expensive.
So you can see that an apparently simple one hour flying lesson is in reality a three to four hour test of memory and endurance! Add to that daytime temperatures will be well into the forties and you can see we have our work cut out for us.

But it's not all work work work

Here are some of the ways we have been keeping busy.

At the local ballpark for 4 July celebrations...
...where we helped to break the world record for the most people wearing
false moustaches at the same time (2000).

At the South Mountain County Park

The Organ Pipe Cactus - emblem of Arizona

Phoenix is generally much prettier when it's dark (and your eyes are shut)

Not a bad selection at a local bar

Mucking about in the pool

At the Commemorative Air Force Museum, in Mesa. Douglas A26.

Schweizer TG-3A Army Training Glider
A very shiny Mustang

My first baseball game. Hardly anyone in the crowd and the Goodyear
Centennials lost, but hey it was only $1 a pint.


Note: A recent rule change means I am not allowed to take photographs in the aircraft. Any pictures on this blog from this point on showing the inside of a flying aircraft or the landscape will have to be borrowed from previous courses or found on the internet.